
Learning how to make AI videos no longer means filming every scene yourself. A beginner can combine a few AI tools: one to plan the script, one to generate footage, one for narration, and an editor to put it all together. This guide walks through the full process from first idea to final export, using one small example project so you can see how the steps connect.
AI can help with scripting, visuals, voiceover, and editing, but the result still depends on planning and review. Generated clips can contain visual errors, and no tool replaces a clear idea of what the video should say.
What Do You Need to Make AI Videos?
Before you learn how to make AI videos step by step, it helps to know the minimum setup:
- A video idea and a short script. A chatbot can help you draft it, but you decide what the video is about and check the facts.
- At least one AI video tool. This can be a generator that creates clips, a tool that assembles a video from a script, or an avatar platform.
- A way to add narration and sound. Some models generate audio with the video, while others produce silent clips.
- A video editor. Many AI platforms include basic editing, but a regular editor is still useful for trimming, captions, and music.
There are two common ways to approach how to make AI videos. An all-in-one workflow uses one platform for generation, narration, and editing. It is easier to learn, but you get less control over each stage. A multi-tool workflow uses a separate tool for each job. It takes more effort, but you can choose the strongest option for visuals, voice, and editing.
Many tools offer free access in some form, usually limited credits, watermarked exports, or a trial. Free access rarely means unlimited video generation, so check each tool’s current limits before you plan a project around it. For a broader introduction to the category, see our AI video generator guide.
How to Make AI Videos in 7 Steps
Throughout the steps, we’ll build one example: a 30-second video about a morning coffee in a small café. Following one project from start to finish is the easiest way to see how to make AI videos in practice. It’s short enough to finish in one sitting and simple enough to show every stage of AI video creation.
Step 1: Choose the Type of Video You Want to Create
The format you pick decides which tools make sense, which makes it the first decision in any plan for how to make AI videos. Common options include:
- YouTube explainers and educational videos. These usually need a script, narration, and a mix of visuals, so a script-to-video platform or a multi-tool workflow fits well.
- Faceless videos. The audience sees footage, images, or animation while a voice narrates. Our guide to an AI-powered faceless YouTube workflow covers this format in more depth.
- Social media clips. Short, vertical videos for Shorts, Reels, and TikTok often rely on a handful of generated shots plus captions.
- Product videos. These work well with image-to-video tools, since you can start from a real product photo instead of describing the product in words.
- Avatar presenter videos. A virtual presenter reads your script on camera, which suits training and announcements.
Decide the format, the length, and the platform before you open any tool. That one habit makes the entire process far less confusing.
Example project: a 30-second vertical video (9:16) for short-form platforms, made from four AI-generated shots with narration and captions.
Step 2: Write a Script or Video Outline
Every good plan for how to make AI videos starts with a short script, split into scenes. Each scene becomes one clip later. For a 30-second video, roughly 50 to 75 spoken words is a workable range, though pacing varies by voice and style. Aim for the lower end if you want room for pauses. The example below uses about 50.
You can ask an AI chatbot for a first draft, then edit it so it sounds like you. Here is a prompt you can reuse:
text
Write a [30/60]-second video script about [topic] for [audience].
Use short sentences and a conversational tone.
Start with a hook in the first sentence.
Divide the script into [4/6] scenes. For each scene, give me:
1. The narration line
2. A one-sentence description of what should appear on screen
Do not invent statistics. Mark any claim that needs fact-checking with [CHECK].
Applied to the example, the script breaks down like this:
| Scene | Time | On screen | Narration |
|---|---|---|---|
| 1 | 0–7s | Sunlit café seen from the street | “Every morning starts the same way: a quiet street, a small café, and the smell of fresh espresso.” |
| 2 | 7–15s | Barista pulling an espresso shot | “Behind the counter, the first shot of the day is pulled slowly and carefully.” |
| 3 | 15–23s | Steamed milk poured into the cup | “Steamed milk meets espresso, and a simple latte takes shape.” |
| 4 | 23–30s | Close-up of the finished cup | “One cup, and the day can begin.” |
The on-screen column becomes your video prompts in Step 4. The narration column becomes your voiceover in Step 5. Keeping both in one table is a small habit that makes how to make AI videos feel manageable.
Step 3: Choose the Right AI Video Generator
When beginners look for the best AI video tool, the honest answer is that the right choice depends on the format. Tools fall into a few categories, and they overlap more than their names suggest. The main trade-off is usually cinematic control versus all-in-one convenience. Generators built around clip creation tend to give you more control over how a shot looks. Script-to-video platforms save time by assembling everything for you.
Use this table to match your goal to a starting point:
| What you want to make | Start with |
|---|---|
| Cinematic scenes from a written description | Text-to-video |
| An animated version of a product photo or existing artwork | Image-to-video |
| A narrated video assembled from a script | Script-to-video |
| A virtual presenter speaking to the camera | AI avatar platform |
| Changes to footage you already have | AI video editor |
Applied to the example, text-to-video is the natural fit, since we’re creating scenes from descriptions. If the café needs to look identical in every shot, a better route is to create one reference image first and use image-to-video for each scene.
According to the companies’ own pages, several major platforms cover the generation side:
- Runway’s help documentation says its Gen-4.5 model supports both text-to-video and image-to-video.
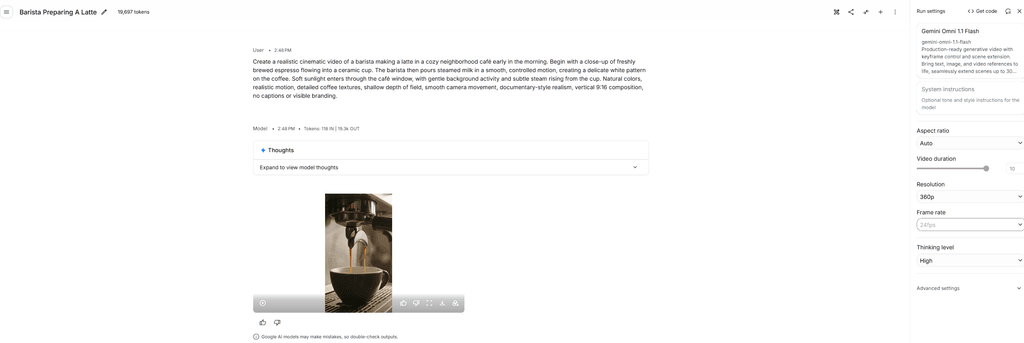
- Google DeepMind’s Gemini Omni family generates video from text and image prompts, including audio in some versions. Gemini Omni 1.1 Flash, announced in August 2026, was described as adding richer audio, reference-image control, and scene extension. Check Google’s page for the newest version.
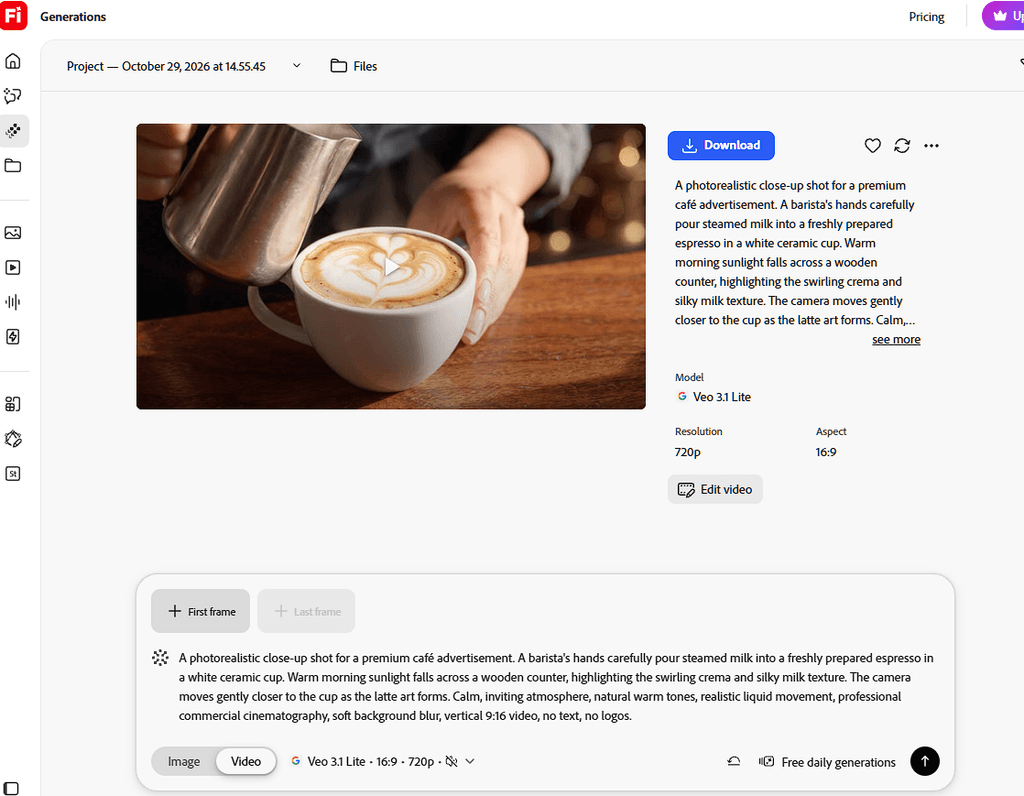
- Adobe Firefly offers text-to-video, image-to-video, and an AI video editor. Adobe notes that commercial-use eligibility depends on the model you use, and that Firefly includes a limited number of free uses through certain plans. Firefly also hosts partner models, and that lineup changes, so check the current model list.
Whichever platform you pick, the rest of the process for how to make AI videos stays largely the same. For a side-by-side look at specific tools, see our roundup of the best AI video generators.
Step 4: Generate Your Video Clips
This is the stage most people picture when they think about how to make AI videos, but it works best when the earlier planning is done. Generate your video one short shot at a time rather than asking for the whole video in a single prompt. Most generators produce short clips, from a few seconds to around ten depending on the tool, so one scene per clip is a natural fit. Short clips are also easier to review and redo. If one shot has a glitch, you regenerate only that shot.
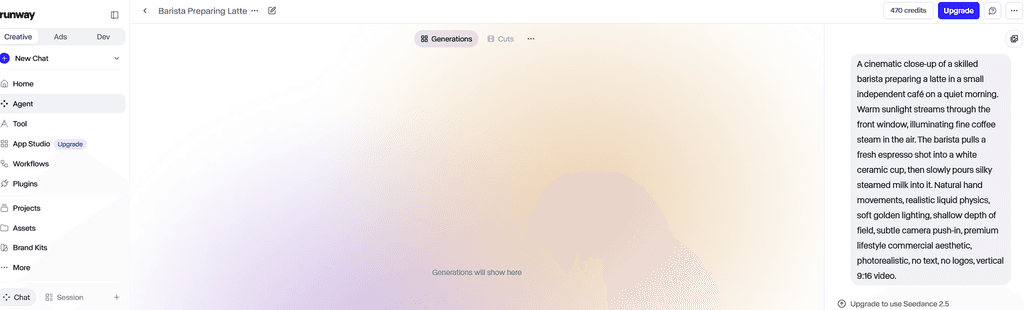
A strong video prompt describes six things: the subject, the action, the setting, the camera movement, the lighting, and the visual style. Here is a template:
A [subject] [action] in [setting].
Camera: [slow push-in / handheld / wide establishing shot / overhead].
Lighting: [soft morning light / neon night / overcast daylight].
Style: [realistic / cinematic / hand-drawn animation / documentary].
Applied to the example, here are the four prompts. Notice that every prompt repeats the same setting details (“small sunlit café, wooden counter, white ceramic cups”). Repeating those details is a simple way to keep the scenes looking like they belong together.
Scene 1: Exterior of a small café on a quiet street, wooden door and
window signs, steam rising from a vent.
Camera: slow push-in toward the entrance.
Lighting: warm early morning sunlight.
Style: realistic, shallow depth of field.

Scene 2: A barista pulls an espresso shot behind a wooden counter in a
small sunlit café, white ceramic cups lined up beside the machine.
Camera: close-up from the side, slow push-in.
Lighting: warm morning window light.
Style: realistic, shallow depth of field.

Scene 3: A barista pours steamed milk into a white ceramic cup on a
wooden counter in a small sunlit café.
Camera: overhead, slow rotation.
Lighting: warm morning window light.
Style: realistic, shallow depth of field.

Scene 4: A finished latte in a white ceramic cup on a wooden counter in
a small sunlit café, steam rising.
Camera: static close-up.
Lighting: warm morning window light.
Style: realistic, shallow depth of field.
Expect several attempts per shot and keep the best one. Prompting improves with practice, especially when you learn to describe specific actions, camera movements, and lighting conditions. Our guide to camera angles and shot types gives you vocabulary for describing shots, and it carries over from AI images to video.
Step 5: Add Voiceover, Music, and Sound Effects
Sound is the part of how to make AI videos that beginners neglect most often. Some video models generate sound in the same pass as the footage, including ambient audio and dialogue. Others produce silent clips. Even when audio is included, many creators add separate narration so they can control wording and pacing.
For AI narration, keep a few checks in mind:
- Pacing. Read the script aloud and compare it to the generated narration. A voice that runs too fast or too slow makes the whole video feel off.
- Pronunciation. Names, brands, and technical terms are common trouble spots. Listen to the full track before you commit.
- Levels. Narration should sit clearly above music, so lower the music under spoken parts.
- Licensing. Check the terms for any AI voice, music library, or sound effect you use, especially for videos you plan to monetize.
Applied to the example, paste the four narration lines into your voice tool as one continuous script, then add soft café ambience and a quiet instrumental track. If your video model already generated usable ambient sound, you can keep it and layer the narration on top.
If you plan to produce narration at volume, our breakdown of AI voiceover tools and costs explains how usage-based pricing adds up.
Step 6: Edit the Clips Into a Complete Video
Editing is where separate clips become a video, and it is a core part of how to make AI videos that look finished rather than assembled. A conventional video editor is still useful even when every shot is AI-generated, and many AI platforms also include a built-in timeline.
Work through these tasks in order:
- Sequence the clips to match your scene list.
- Trim each clip so it ends when the action ends. Cutting the first and last moments often removes small glitches.
- Add narration and line it up with the visuals.
- Add captions. Many viewers watch without sound, especially on social platforms.
- Add music at a low level, and keep transitions simple.
- Check consistency. Colors, lighting, and style should feel like one video, not four unrelated clips.
Applied to the example, the timeline is four clips of roughly 7 to 8 seconds each, simple cuts between them, captions that mirror the narration, and the music track running underneath. Restraint helps here. Too many effects make AI footage look busier and expose its flaws.
Step 7: Export and Review Your Video
The last stage of how to make AI videos is a careful review before you publish. First, choose the aspect ratio for the platform. Landscape (16:9) is the standard for traditional YouTube videos, while vertical (9:16) suits Shorts, Reels, and TikTok. Resolution requirements differ by platform and tool, and no single setting is ideal for every use, so check the platform’s current upload guidance.
Then watch the full export from start to finish, ideally on a phone and a computer. Look for:
- Visual errors such as distorted hands, shifting objects, or garbled on-screen text
- Audio problems like clipping, uneven volume, or mispronounced words
- Caption typos and timing issues
- Claims in the narration that you have not verified
- Anything that could be mistaken for a real person or event when it is not
Applied to the example, the café video would be exported as 9:16 and checked for the usual trouble spots: the cup’s shape changing between shots, steam behaving oddly, and any text that appears on signs or cups. Fix problems before you publish, since a second review pass is faster than correcting a live video.
Common Mistakes to Avoid When Making AI Videos
Most problems with AI footage trace back to a handful of habits. If you are learning how to make AI videos, watch for these:
- Skipping the plan. Jumping straight into a generator wastes credits. A script and scene list save time later.
- Vague or overloaded prompts. “A cool video about success” gives the model nothing concrete. Describe one subject doing one action per shot.
- Inconsistent characters and scenes. Without reference images or repeated setting details, a character or location may look different in every clip.
- Ignoring audio quality. Viewers forgive imperfect visuals more readily than bad sound.
- Using too many effects or transitions. Simple cuts usually look more professional.
- Publishing without reviewing the footage. Small generation errors are easy to miss until a viewer points them out.
- Assuming AI output is cleared for commercial use. Terms vary by tool, plan, and model. Read the license for the specific tool you used, and review the output before publishing.
Avoiding these habits matters as much as choosing the right tool if you want to publish videos you are proud of.
Can You Make AI Videos for Free?
Often partly. Learning how to make AI videos for free is realistic, but free access to an AI video maker usually falls into one of three categories:
- Free tiers provide a recurring allowance of credits or generations, often with limits on length, resolution, or watermarks.
- Trial credits give you a one-time allowance to test the tool.
- Paid subscriptions unlock higher limits, longer or higher-quality output, and often commercial-use permissions.
Limits and terms change frequently, so confirm them on each tool’s official website before you start. Adobe, for example, states that Firefly includes a limited number of free video uses through certain plans, but the details depend on the plan and model. Plan your first project around a few short clips so you stay within whatever allowance you have. Treat the free allowance as practice time for how to make AI videos before you commit to a paid plan.es that Firefly includes a limited number of free video uses through certain plans, but the details depend on the plan and model. Plan your first project around a few short clips so you stay within whatever allowance you have.
Frequently Asked Questions
How do beginners make AI videos?
The easiest way to learn how to create AI videos is to start with a short script, split it into scenes, generate one clip per scene, add narration and captions, then edit everything together. Begin with a video under a minute. Short projects are easier to finish and review.
Can I make AI videos for free?
You can often start for free through limited credits, free tiers, or trials, but unlimited free generation is uncommon. Free access is usually enough to practice how to make videos with AI, though not to produce unlimited content. Check each tool’s current limits and whether free outputs include watermarks or restrict commercial use.
Can AI create an entire video from a text prompt?
It depends on the tool. Some can assemble a complete video from a script or topic, and some models generate clips from text. How to make AI videos from a single prompt therefore varies by platform, and most creators still review, edit, and combine several outputs to get a finished video.
Do I need editing skills to make AI videos?
Not advanced ones. To learn how to make AI videos, basic skills such as trimming clips, adding captions, and adjusting audio levels are enough for most beginner projects, and many AI platforms include simple editors.
Can I monetize AI-generated videos on YouTube?
It depends on YouTube’s current policies, not on whether AI was used. Factors that matter include originality, whether you add meaningful value, compliance with rules on repetitive or mass-produced content, disclosure of realistic synthetic content, and having the rights to everything in the video. Review YouTube’s current monetization policies before you publish, and do not assume approval. The same review habits from the steps above apply to how to make AI videos intended for monetization.
Final Thoughts
Creating an AI video comes down to seven steps: pick a format, write the script, choose a tool, generate short clips, add sound, edit, and review the export. You do not need every tool category for every project, and a simple all-in-one platform is enough for a first video.
Start with one short, focused project like the 30-second café example. You will learn more from finishing it than from comparing tools in the abstract, and you can add voice tools, reference images, and a separate editor as your projects grow. Once you know how to make AI videos at this scale, our guide to the best AI video generators is the natural next step for choosing a tool.
Pingback: AI Video Prompts: 25+ Examples and Templates for Better Results -
Agreed that no tool replaces a clear idea. The failure mode we see most is people treating prompt wording as the quality lever when the source images decide far more. Splitting the job across four tools also hides a cost: every handoff loses a little consistency. We collapse it to photos in, format chosen, clip out, which trades flexibility for a repeatable result.