
Adding 2-3 specific photography terms to your prompt is the single most powerful technique for turning a flat, generic AI image into photorealistic art that looks like it was captured on a professional camera. Most Midjourney users describe what they want to see—they forget to tell the model how to frame it. Midjourney camera angles, shot types, and lens keywords are the hidden layer of control that separates amateur outputs from cinematic, gallery-worthy results.
Once you have perfectly timed your 60-second YouTube Short script, you need compelling B-roll to keep the audience hooked. That’s where cinematic AI art comes in.
This cheat sheet is built for copy-pasting. No fluff—just the exact prompt terms, what they do, and when to use them.
Mastering Midjourney Shot Types for Perfect Framing
Drop any of these directly into your prompt to control how much of the subject fills the frame.
| Prompt Keyword | Visual Effect | Best Used For |
|---|---|---|
| Extreme Close-Up (ECU) | Fills the entire frame with one detail — an eye, a texture, a mouth | Emotion, product detail, tension |
| Close-Up Shot (CU) | Face or object from neck/base upward | Portraits, character studies, product hero shots |
| Medium Shot (MS) | Subject from waist up | Conversations, interviews, lifestyle content |
| Cowboy Shot | Subject from mid-thigh up | Action, western aesthetic, confident characters |
| Full Body Shot | Entire subject, head to feet | Fashion, character design, environment integration |
| Wide Establishing Shot (WS) | Subject small within a large environment | Storytelling, world-building, cinematic openers |
| Extreme Wide Shot (EWS) | Subject barely visible against vast landscape | Scale, isolation, epic landscapes |
Pro tip: Combine shot type with subject scale for tighter control. Example: “medium shot of a woman in a neon-lit Tokyo alley” vs. just “woman in Tokyo alley” produces dramatically different outputs.
The Ultimate Midjourney Camera Angles List
Camera angle controls the viewer’s psychological relationship to the subject. These aren’t stylistic choices—they’re mood engineering.
- Eye Level — Neutral, natural, relatable. The default human perspective. Use when you want the viewer to feel equal to the subject. Prompt: “eye level shot of…”
- High Angle — Camera looks down at the subject. Creates vulnerability, smallness, or surveillance. Makes subjects feel watched or diminished. Prompt: “high angle shot, slightly overhead…”
- Low Angle (Worm’s Eye View) — Camera looks up at the subject. Generates power, dominance, and heroism. Makes subjects feel towering and formidable. Prompt: “low angle shot, worm’s eye view…”
- Bird’s Eye View — Straight down from directly above. Flattens depth, creates graphic/map-like compositions. Ideal for architectural shots, flat lays, and abstract compositions. Prompt: “bird’s eye view, directly overhead…”
- Over the Shoulder (OTS) — Camera placed behind one subject looking toward another. Creates intimacy, conversation dynamics, and depth of field contrast. Prompt: “over the shoulder shot…”
- Dutch Angle (Canted Angle) — Camera tilted diagonally on the horizontal axis. Generates unease, disorientation, psychological tension. Classic thriller aesthetic. Prompt: “Dutch angle, tilted camera…”
- Aerial Drone Shot — Elevated wide perspective as if from a drone. Sweeping, cinematic, geographic. Prompt: “aerial drone shot, high altitude…”
Midjourney camera angles respond exceptionally well to stacking: “low angle, Dutch tilt, worm’s eye view” compounds the psychological effect of each individual term.
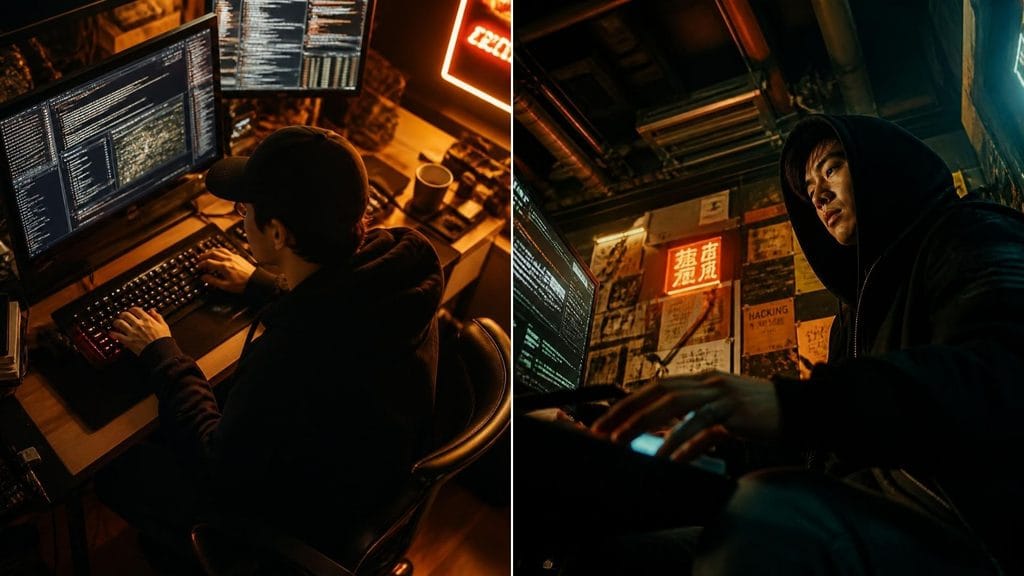
Best Lenses for AI Photography Prompts
The lens keyword controls focal length, bokeh depth, distortion, and the overall “feel” of the image — arguably more than any other single variable in ai photography prompts.
Standard & Portrait Lenses:
- 35mm lens — Slightly wide, natural field of view. The “human eye” lens. Street photography, environmental portraits, documentary feel.
- 50mm lens — Perfectly neutral perspective, no distortion. Clean, classic, editorial. Most versatile for general use.
- 85mm portrait lens — Shallow depth of field, creamy background blur, flattering subject compression. Best for portraits and beauty shots.
- 135mm telephoto lens — Strong background compression, subject isolation. Fashion, wildlife, sports.
Specialty & Creative Lenses:
- Macro lens — Extreme close-up capability, revealing micro-detail invisible to the naked eye. Product photography, nature, texture studies.
- Anamorphic lens — Horizontal lens flares, wider aspect ratio, cinematic stretch. Blockbuster movie aesthetic.
- Fisheye lens / GoPro wide angle — Heavy barrel distortion, 180-degree field of view. Action sports, architectural distortion, creative portraits.
- CCTV / security camera footage — Grainy, wide-angle, surveillance aesthetic. Adds lo-fi realism, thriller mood, found-footage tone.
- Tilt-shift lens — Miniaturize effect on real-world subjects. Makes cities and crowds look like tiny models.
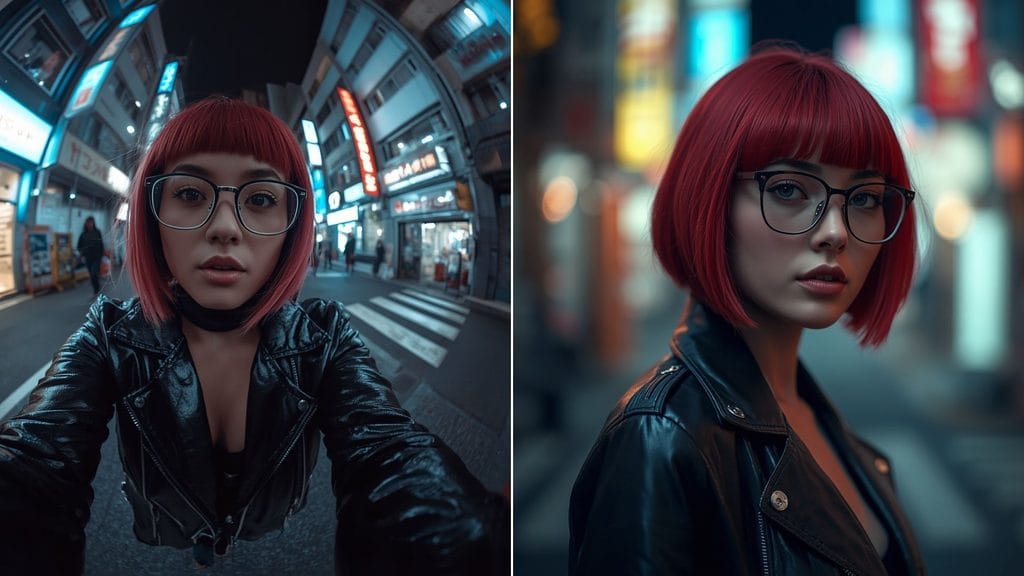
Essential Midjourney Camera Settings for Realism
These midjourney camera settings terms signal technical photographic realism to the model, pushing outputs away from “digital art” and toward convincing photography.
Aperture & Exposure:
- f/1.4 aperture — Maximum bokeh, razor-thin focus plane, low-light capability
- f/1.8 aperture — Beautiful background blur, slightly sharper than f/1.4, portrait standard
- f/8 aperture — Sharp throughout, landscape and architecture standard
- ISO 100 — Clean, noiseless, daylight exposure
- ISO 3200 — Visible grain, low-light atmosphere, documentary feel
- Long exposure — Light trails, motion blur on water, star trails
- Motion blur — Speed, kinetic energy, cinematic action
Film Stocks (Extremely Powerful for Realism):
- Kodak Portra 400 — Warm skin tones, soft contrast, analog portrait classic
- Kodak Ektar 100 — Vivid, saturated, fine grain. Landscape and travel photography
- Fujifilm Superia 400 — Cool tones, high contrast, street photography aesthetic
- Ilford HP5 — Black and white, classic grain, documentary and fine art
- Cinestill 800T — Tungsten-balanced, halation effect on highlights, neon city nights
Additional Realism Modifiers:
- RAW photo — Signals unprocessed, high-detail photographic output
- Shot on Canon EOS R5 / Shot on Sony A7R V — Camera brand references that shift the model toward photorealistic rendering
- Natural lighting / Golden hour lighting / Studio lighting — Controls light source character
- Lens flare — Optical artifact that adds photographic authenticity
- Chromatic aberration — Color fringing at edges that mimics real lens physics
- Film grain — Analog texture overlay that breaks digital sterility
The Master Formula for Cinematic AI Art
This is the combinatorial framework that produces consistently professional results. Every high-performing prompt for cinematic ai art uses this sequence:
[Subject + Action] + [Shot Type] + [Camera Angle] + [Lens] + [Camera Settings] + [Lighting] + [Style/Mood]
Example Prompt 1 — Dramatic Portrait:
A weathered deep-sea fisherman pulling in nets, close-up shot, low angle looking up, 85mm portrait lens, f/1.8 aperture, ISO 800, overcast natural lighting, shot on Sony A7R V, Kodak Portra 400 film stock, photorealistic, ultra-detailed
What this does: The low angle creates quiet heroism. The 85mm compresses background into soft blur. Portra 400 warms his skin tones. The overcast light eliminates harsh shadows and adds melancholy. The result looks like a National Geographic cover.
Example Prompt 2 — Cinematic Urban Night Scene:
A lone woman in a red coat standing in a rain-soaked Tokyo alleyway, full body shot, eye level, 35mm lens, Dutch angle, f/2.8 aperture, ISO 3200, neon reflections on wet pavement, Cinestill 800T film stock, lens flare, motion blur on passing traffic, cinematic, photorealistic –ar 16:9
What this does: The Dutch tilt adds psychological unease. Cinestill 800T creates the signature halation glow around neon signs. ISO 3200 introduces grain that sells the night atmosphere. The 35mm keeps the environment present without distorting it. The motion blur on background traffic grounds the still figure against a world in motion.
Using consistent camera angles across your videos is a secret weapon for faceless YouTube automation agencies to build brand identity.
Quick-Reference Formula Card:
| Element | Example Options |
|---|---|
| Shot Type | ECU, Close-Up, Medium, Cowboy, Full Body, Wide |
| Camera Angle | Eye Level, Low Angle, Bird’s Eye, Dutch Tilt, OTS |
| Lens | 35mm, 50mm, 85mm, Macro, Fisheye, Anamorphic |
| Aperture | f/1.4, f/1.8, f/2.8, f/8 |
| ISO | 100, 400, 800, 3200 |
| Film Stock | Kodak Portra 400, Cinestill 800T, Ilford HP5 |
| Light | Golden hour, overcast, studio, neon, candlelight |
| Realism Tag | Shot on [camera], RAW photo, film grain, lens flare |
Copy the formula. Swap the variables. Test one change at a time to understand exactly what each term contributes to your output.
Final Thoughts on Mastering Your Prompts
Stop leaving your AI generations to chance. By deliberately applying these specific camera angles, precise shot types, and realistic lens modifiers, you instantly transform from a casual prompter into a digital cinematographer. Bookmark this cheat sheet, keep it open during your next creative session on Midjourney or DALL-E, and watch the quality of your images evolve instantly.
Frequently Asked Questions (FAQ)
How do I combine midjourney camera angles with different midjourney shot types?
The most effective method is to define the framing first, then apply the perspective. Start your prompt with specific midjourney shot types (like a “Medium Shot” or “Full Body Shot”) to establish how much of the character is visible. Then, immediately follow it with midjourney camera angles (such as a “Low Angle” or “Dutch Tilt”) to dictate the camera’s physical position. This exact sequence gives you total control over the final composition.
Why do my ai photography prompts look like digital illustrations instead of cinematic ai art?
This is a common issue that occurs when users only describe the subject and ignore the camera. To achieve true, photorealistic cinematic ai art, your ai photography prompts must include physical camera terminology. Adding exact lens types (like a 35mm lens) and film stocks forces the AI to render the image as a real photograph rather than a smooth digital painting.
Do technical midjourney camera settings like ISO and aperture actually work?
Yes, absolutely! Including specific midjourney camera settings—such as “f/1.8 aperture” for shallow depth of field, or “ISO 3200” for low-light film grain—acts as a powerful modifier. The AI has been trained on millions of real photographs, so it perfectly associates these technical terms with their real-world visual effects.
Do these midjourney camera settings work in DALL-E 3 or Stable Diffusion?
Yes. While this cheat sheet is heavily optimized around midjourney camera settings, the core photographic terminology is universal. DALL-E 3 and Stable Diffusion XL are also trained on real-world photographic data. This means they will perfectly understand terms like “35mm lens,” “f/1.8 aperture,” or a “Dutch Angle,” allowing you to generate cinematic ai art regardless of the platform you are using.
Why is the AI ignoring my midjourney camera angles in the generated image?
If the generator ignores your requested midjourney camera angles, your subject description might be too long or dominant. To fix this, move your camera and lens keywords closer to the front of your ai photography prompts. AI models prioritize the words at the very beginning of the text string. Placing your perspective and shot type commands early ensures the framing is established before the AI focuses on smaller details.