OpenArt AI is a web-based AI image generator platform that utilizes Stable Diffusion models to allow users to create, edit, and remix high-quality visuals without needing complex coding or local installation. If you’ve ever stared at a Midjourney prompt like hyperrealistic portrait, octane render, 8k, volumetric lighting, unreal engine, bokeh, cinematic composition, --ar 16:9 --q 2 --stylize 750 and thought “I just want to make a cool picture of a dragon,” then OpenArt AI is about to become your new best friend.
Here’s the painful truth about AI art: the results are only as good as your prompts. And mastering prompt engineering feels like learning a new programming language—except instead of debugging code, you’re debugging why your “majestic lion” looks like a deformed house cat with extra ears.
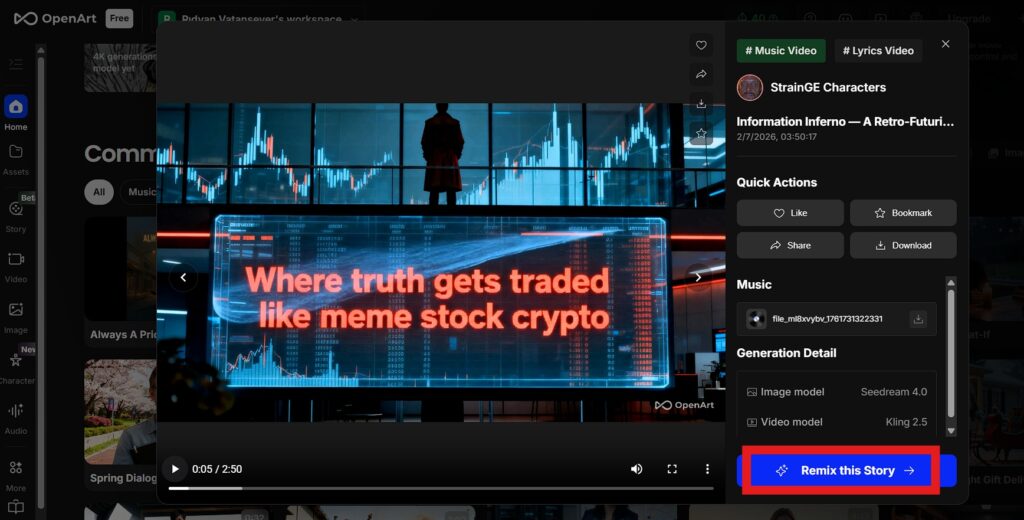
OpenArt AI solves this with the most brilliant lazy-person hack imaginable: the Remix button. Browse millions of community-generated images, find one you love, click “Remix,” and instantly steal the entire prompt, model, and settings that created it. Change “cat” to “dog,” hit generate, and congratulations—you’re now an AI art wizard without memorizing a single parameter.
Let me show you why OpenArt AI is the ultimate “Zero Skill” AI art generator for people who want professional results without the professional learning curve.
The “Zero Skill” Philosophy: Why Learn When You Can Copy?
Traditional AI art platforms expect you to understand concepts like:
- Negative prompts (what you don’t want in the image)
- Sampling methods (Euler, DPM++, DDIM—what?)
- CFG Scale (how strictly the AI follows your prompt)
- Seed values (for reproducibility)
- Model checkpoints (Realistic Vision vs. DreamShaper vs. Deliberate)
This is too much cognitive overhead for people who just want to make cool visuals. OpenArt AI acknowledges this reality and builds its entire UX around browsing, remixing, and iterating instead of starting from scratch.
Here’s the workflow that makes OpenArt AI genuinely “Zero Skill”:
Step 1: Browse the community gallery (millions of user-generated images)
Step 2: Find an image with a style/vibe you like
Step 3: Click “Remix”
Step 4: Modify the prompt slightly (change the subject, colors, or setting)
Step 5: Generate your version
You’re not learning prompt engineering—you’re learning by example. It’s the difference between reading a programming textbook and copying Stack Overflow code. Both get you to the same result, but one is infinitely faster.
Key Feature 1: The Remix Button (Stealing Prompts Has Never Been Easier)
This is the crown jewel of OpenArt AI. Every image in the community gallery includes full transparency: the exact prompt used, the model checkpoint, all parameter settings, and even the seed value.
Example: I found a stunning cyberpunk cityscape with neon rain. Clicked “Remix.” The prompt was: cyberpunk city street, neon signs, rain-soaked pavement, blade runner aesthetic, moody lighting, cinematic, 8k --ar 16:9
I changed it to: steampunk village square, gas lamps, cobblestone streets, Victorian aesthetic, foggy atmosphere, cinematic, 8k --ar 16:9
Hit generate. Instant steampunk masterpiece. Zero effort. Maximum results.
This remix AI art workflow is perfect for people who:
- Don’t know how to describe what they want, but recognize it when they see it
- Need variations on a theme (same style, different subjects)
- Want to learn prompt construction through reverse-engineering successful examples
The “Zero Skill” magic? You’re essentially crowdsourcing the hard part (figuring out which parameters work) and just swapping in your creative ideas. It’s collaborative art without needing to collaborate.
Key Feature 2: Advanced Control Without Advanced Knowledge (ControlNet & Sketch-to-Image)
OpenArt AI includes ControlNet—a powerful feature that sounds technical but is shockingly simple to use. Here’s the beginner-friendly explanation:
Normal AI generation: You describe what you want, the AI interprets it randomly. You might get 10 completely different compositions.
ControlNet: You upload a reference image, and the AI copies its structure (pose, composition, edges) while applying your prompt’s style.
Real-world use case: You want a fantasy character in a specific pose. Instead of describing “warrior standing with sword raised overhead, dynamic pose, heroic stance” and hoping the AI gets it right, you:
- Find a photo of someone in the exact pose you want
- Upload it as a ControlNet reference
- Prompt: “fantasy warrior, armor, magical sword, epic background”
- The AI generates your warrior in that exact pose
This is game-changing for image to image workflows. You maintain creative control over composition without needing to be a professional photographer or 3D modeler.
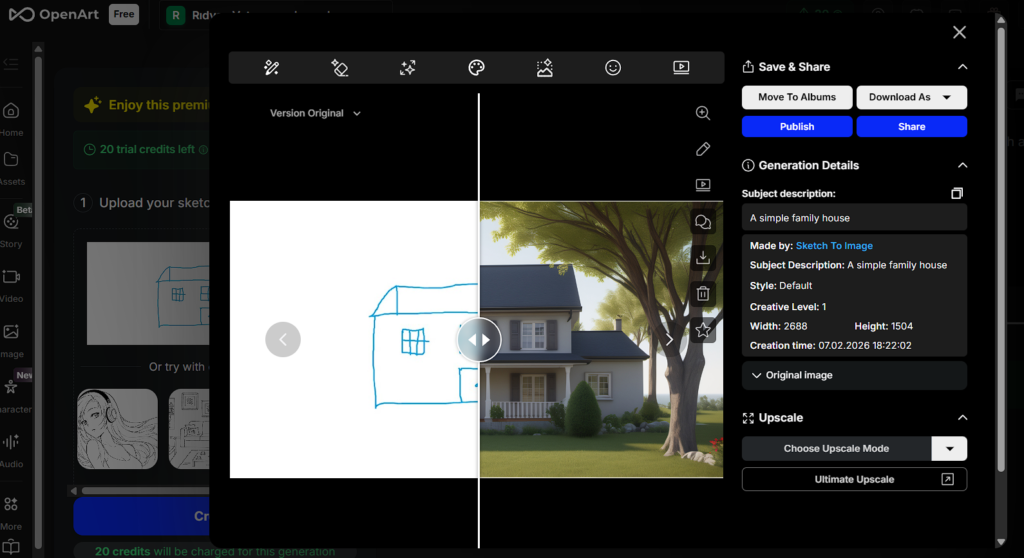
Sketch-to-Image takes this even further. You can literally draw a terrible stick figure in MS Paint, upload it to OpenArt AI, and the Stable Diffusion generator will interpret your scribbles as professional art.
I tested this with a crude sketch of a house (roof, windows, door—kindergarten level). Prompted: “cozy cottage, garden, sunset, watercolor painting style.” The result? A gorgeous illustrated cottage that looked like it belonged in a children’s book. My drawing skills contributed nothing except basic composition.
Zero Skill Verdict: You don’t need to be an artist. You just need to communicate intent (through references or rough sketches), and the AI does the rest.
Key Feature 3: Custom Model Training (LoRA for Personal AI Headshots)
Here’s where OpenArt AI gets genuinely useful for practical applications: LoRA training (Low-Rank Adaptation). This sounds technical, but the interface makes it stupid simple.
What it does: Train a custom AI model on 10-20 photos of yourself (or any specific subject). The AI learns what you look like, then generates new images of you in different settings, poses, or styles.
The “Zero Skill” workflow:
- Upload 10-15 selfies/photos (variety in lighting, angles, expressions)
- Wait ~20 minutes while OpenArt AI trains your custom model
- Prompt: “professional LinkedIn headshot, business attire, office background, natural lighting”
- Generate dozens of professional headshots without hiring a photographer
Real-world use case: You need a professional headshot for your resume before using Jobright AI to apply for jobs. Instead of booking a $200 photoshoot, you spend $5 in OpenArt AI credits and generate 50 variations to choose from.
I tested this with photos of myself. The AI-generated headshots were shockingly convincing—professional lighting, clean backgrounds, even slight retouching. Not perfect (AI still struggles with hands occasionally—if you need a hand model, you might have to hire one on RentAHuman.ai), but more than adequate for LinkedIn, resumes, or business cards.
Other LoRA use cases:
- Product photography (train on your product, generate marketing images)
- Character consistency (create a fictional character, use them across multiple scenes)
- Pet portraits (train on your dog, generate them as a medieval knight, astronaut, etc.)
The barrier to entry is minimal. No coding, no GPU required, no complex setup. Just upload photos and let the platform handle everything.
Pricing & Free Credits: Is OpenArt AI Free?
OpenArt AI operates on a credit system:
Free Tier:
- 50 daily credits (enough for ~10-15 images depending on settings)
- Access to all public models and features
- Community gallery browsing and remixing
Paid Plans:
- Starter: $12/month (~1000 credits)
- Hobbyist: $20/month (~3000 credits)
- Pro: $40/month (~8000 credits)
The “Zero Skill” evaluation: The free tier is genuinely usable for casual creators. Unlike Midjourney (which killed its free tier), OpenArt AI gives you daily AI art generator free credits, so you can experiment without financial commitment.
For serious use (client work, high-volume generation, custom LoRAs), the paid tiers are reasonably priced compared to Midjourney ($10/month for limited generations) or running Stable Diffusion locally (requires expensive GPU).
Pro tip: Use your free daily credits to experiment and learn. Upgrade only when you’re consistently hitting the limit.
OpenArt AI vs. Midjourney vs. Civitai (The Honest Comparison)
Let’s address the elephant in the algorithm: How does this OpenArt AI review stack up against competitors?
Midjourney:
- Pros: Consistently gorgeous, “artistic” results. Great for stylized illustrations.
- Cons: Discord-based interface is clunky. No fine control (ControlNet, inpainting). No custom model training. Expensive for casual users.
- Verdict: Better for pure aesthetics, worse for control and workflow.
Civitai:
- Pros: Massive model library. Completely free (if you run locally). Ultimate customization.
- Cons: Requires technical setup (install Stable Diffusion WebUI, manage models, CUDA drivers). Not beginner-friendly.
- Verdict: Best for power users willing to tinker. Overwhelming for beginners.
OpenArt AI:
- Pros: Web-based (no installation). Remix feature makes learning instant. ControlNet and LoRA built-in. Free daily credits.
- Cons: Results can be inconsistent (depends on model choice). Less “magical” than Midjourney’s curated aesthetic.
- Verdict: Best middle ground—powerful tools with accessible UX.
The “Zero Skill” recommendation: If you’re a complete beginner, start with OpenArt AI. The remix workflow teaches you prompt engineering organically. Once you understand the fundamentals, you can graduate to Midjourney (for art) or Civitai (for control).
Think of OpenArt AI as the training wheels for text to image generation. Except the training wheels are actually useful, not just limiting.
The Verdict: Best Stable Diffusion Generator for Non-Coders
OpenArt AI excels at making powerful Stable Diffusion tools accessible to normal humans. The remix button eliminates the prompt engineering learning curve. ControlNet gives you composition control without needing photography skills. LoRA training lets you create custom models without writing code.
Best for:
- Beginners who want professional results without memorizing parameters
- Designers who need specific poses/compositions (ControlNet is a lifesaver)
- Anyone creating personal content (AI headshots, pet portraits, custom art)
- People who learn by example (remix workflow is educational)
Not ideal for:
- Pure “art for art’s sake” creators (Midjourney is more consistent aesthetically)
- Users who want complete control over every parameter (Civitai’s local setup offers more)
- Commercial projects requiring absolute rights clarity (AI art copyright is still murky)
The “Zero Skill” rating? High. You can create professional-looking images on day one by remixing community art. The platform rewards curiosity and experimentation over technical expertise.
If you’ve been intimidated by AI art because the tools felt too complex, OpenArt AI is your entry point. Start with the free tier, remix some community favorites, and discover that you’ve been an AI artist all along—you just needed the right tool to prove it.
Frequently Asked Questions About OpenArt AI
Is OpenArt AI free?
Yes, OpenArt AI offers a generous free tier with daily credits. You get 50 credits per day, which translates to approximately 10-15 image generations depending on resolution and settings. This is enough for casual experimentation and learning the platform. Unlike Midjourney (which discontinued its free tier), OpenArt AI remains accessible to users who aren’t ready to commit financially. The free version includes access to all features—community gallery, remix functionality, ControlNet, and even custom LoRA training (though training consumes more credits). If you’re a hobbyist or just exploring AI art generator free options, the daily credits are sufficient. For professional or high-volume use, paid plans start at $12/month.
Can I use OpenArt AI images commercially?
It depends on the model and your subscription tier. OpenArt AI offers both commercial-safe and non-commercial models. When generating images, the platform indicates whether the selected model allows commercial use. Generally, Pro subscribers have broader commercial rights, but you’re still responsible for verifying that specific models permit commercial applications. AI-generated art exists in a legal gray area—some models are trained on copyrighted data, which complicates commercial licensing. Best practice: If you’re creating content for clients or selling products, stick to models explicitly marked “commercial use allowed” and consider consulting a lawyer for high-stakes projects. For personal projects, portfolios, or internal use, you’re almost certainly fine.
Is OpenArt AI better than Midjourney?
Different tools for different needs. Midjourney produces more consistently “artistic” and aesthetically pleasing results—it’s optimized for beauty and coherence. OpenArt AI offers more control and flexibility through features like ControlNet, custom LoRAs, and precise parameter tuning. If you want gorgeous illustrations with minimal effort, Midjourney wins. If you need specific poses, want to train custom models, or prefer a web interface over Discord, OpenArt AI is superior. Cost-wise, OpenArt AI’s free tier makes it more accessible for beginners. The “Zero Skill” take: Start with OpenArt AI to learn fundamentals (the remix feature is an incredible teacher). Upgrade to Midjourney later if you need consistently high aesthetic quality.
What is ControlNet and why should I care?
ControlNet lets you control the structure and composition of generated images. Imagine you want an AI-generated character in a specific action pose. Without ControlNet, you describe the pose in your prompt and hope the AI interprets it correctly (spoiler: it usually doesn’t). With ControlNet, you upload a reference image (photo, sketch, 3D render) showing the exact pose, and the AI copies that structure while applying your prompt’s style. Real-world example: You find a stock photo of someone doing a yoga pose. Upload it to OpenArt AI with ControlNet enabled. Prompt: “fantasy elf, magical forest, ethereal lighting.” The AI generates an elf in that exact yoga pose with your fantasy styling. This is game-changing for professional work where composition matters. Zero Skill benefit: You don’t need to describe complex poses or perspectives—just show the AI what you want.
How does the Remix feature work on OpenArt AI?
Remix copies all parameters from an existing image, letting you modify and regenerate. When you browse OpenArt AI’s community gallery and find an image you like, clicking “Remix” reveals the full recipe: the text prompt, model used, negative prompts, sampling method, CFG scale, steps, and seed value. You can then edit any of these parameters before regenerating. Common remix workflow: Find a portrait you love → Remix → Change “woman” to “man” → Change “red dress” to “blue suit” → Generate. You get a completely new image in the same style/quality as the original. This is the ultimate shortcut for remix AI art beginners—you’re learning prompt engineering by reverse-engineering successful examples rather than starting from a blank slate. It’s like having access to every artist’s process notes.
Can I train OpenArt AI to generate images of myself?
Yes, through LoRA (custom model training). Upload 10-20 varied photos of yourself—different angles, lighting, expressions—and OpenArt AI trains a personalized model in ~20 minutes. Once trained, you can generate images of yourself in any setting: professional headshots, fantasy character versions, historical eras, artistic styles, etc. Popular use case: Creating LinkedIn headshots without hiring a photographer. Upload selfies, train a LoRA, prompt “professional business headshot, office background, business casual attire,” and generate dozens of options. The AI learns your facial features and can place “you” in contexts you’ve never been photographed in. Limitation: Results depend on photo quality—if your training images are all similar (same angle, same lighting), the AI struggles with variety. Upload diverse photos for best results.
Does OpenArt AI work on mobile?
Yes, the web interface is mobile-responsive. You can generate images, browse the community gallery, and remix art from your phone or tablet. However, the experience is better on desktop for detailed editing (adjusting sliders, viewing full-resolution images, managing multiple generations). For quick generations or browsing inspiration, mobile works fine. For serious projects or complex workflows (ControlNet, inpainting, LoRA training), use a desktop browser. There’s no dedicated mobile app yet, but the text to image generation workflow is simple enough that the web version suffices for most mobile use cases.
What’s the difference between OpenArt AI and running Stable Diffusion locally?
OpenArt AI is Stable Diffusion with a user-friendly interface and no technical setup. Running Stable Diffusion locally (via tools like AUTOMATIC1111 or ComfyUI) requires installing software, managing model files, and ideally having a powerful GPU. It’s completely free (after hardware costs) and offers unlimited generations, but demands technical competency. OpenArt AI removes all friction—it’s web-based, credit-limited, and beginner-friendly. You’re paying (via credits) for convenience and infrastructure. Who should run local Stable Diffusion? Power users generating hundreds of images daily who have technical skills. Who should use OpenArt AI? Everyone else who values time and simplicity over cost savings. The Stable Diffusion generator experience on OpenArt AI is polished enough that most casual users will never need local installation.
Follow ZeroSkillAI.com for more reviews of AI creative tools that make you look talented without requiring actual talent. We test the shortcuts so you can focus on the creative part.
Ready to level up your professional image? Use OpenArt AI to generate a killer headshot, then head over to Jobright AI to land your next job with a resume that looks as good as your new AI-generated profile pic.
Pingback: AI Art Style Cheat Sheet: 100+ Copy-Paste Prompts to Transform Your AI Images from Amateur to Professional -