Here’s what nobody tells you about AI in 2026: Typing prompts into a browser window is already outdated. We spent 2023-2025 asking ChatGPT how to organize files, how to rename photos, how to clean up our desktop. We got instructions. We followed them manually. We still did all the work. That era is over.
The next wave isn’t conversational AI—it’s autonomous AI. Agents that don’t just tell you what to do. They actually do it. On your computer. While you watch. Or sleep. Or binge Netflix. Imagine this: You type “organize my downloads folder” into a chat window on your PC. Three seconds later, every PDF moves to Documents. Every image moves to Pictures. Every installer moves to a Software folder. You didn’t click anything. You didn’t drag files. The AI just… handled it.
This isn’t science fiction. Understanding how to build an AI agent that runs locally on your machine is now accessible to complete beginners in February 2026. And you don’t need a computer science degree to do it.
This guide will show you exactly how autonomous agents work, why they’re different from browser chatbots, and what you actually need to build one yourself. No complex coding. No theoretical computer science lectures. Just practical steps to go from “I ask AI questions” to “I have AI working for me.” By the end, you’ll understand the architecture well enough to master how to build an AI agent this weekend. Let’s make you dangerous.
What Exactly Is a Local Machine Agent? (And How to Build an AI Agent’s Core)
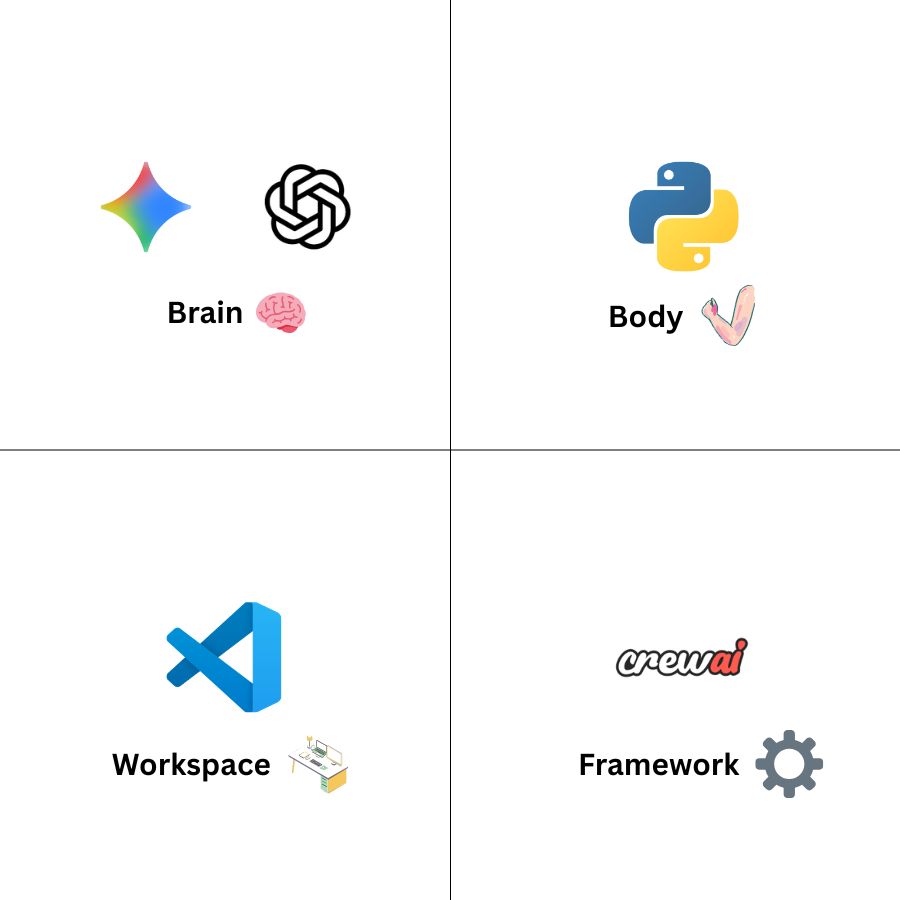
Let’s demystify this immediately. An autonomous agent isn’t magic. When figuring out how to build an AI agent, you just need three simple components working together:
Component 1: The Brain (Large Language Model API) This is ChatGPT, Claude, or Gemini—but accessed through code, not a website. You send it text like “organize my files,” and it responds with instructions. That’s it. The brain doesn’t touch your computer. It just thinks. Think of it like this: The brain is a really smart consultant who’s never physically been to your office. You describe the mess. The consultant tells you exactly what to do. But someone still has to move the files.
Component 2: The Body (Python + Operating System Commands) Python is the programming language that acts as hands for the AI brain. It can:
- List files in folders
- Move, copy, rename, or delete files
- Open applications
- Type text into programs
- Click buttons
- Basically anything you can do with a mouse and keyboard
Think of it like this: Python is the intern who actually does the physical work the consultant recommends. The consultant (LLM) says “move all PDFs to Documents.” Python (the intern) opens the file explorer and moves them.
Component 3: The Loop (The Orchestration Framework) This is what connects the brain and body. It handles the conversation flow:
- Listen to your command
- Send it to the LLM brain
- Receive instructions from the LLM
- Convert those instructions to Python code
- Execute the code
- Report back to you
Frameworks like CrewAI or AutoGen make this loop incredibly simple. They’re basically pre-built templates that handle 90% of the complex logic. Think of it like this: The framework is the office manager who coordinates between the consultant (LLM) and the intern (Python). You don’t have to manage the workflow—the framework does it automatically.
That’s the whole system. Brain, body, loop. When people say “autonomous agent,” they mean these three components working together without you manually copy-pasting between them. three components working together without you manually copy-pasting between them.
The “OpenClaw” Case Study: Your First Agent Project
Let’s make this concrete. When learning how to build an AI agent, it helps to have a real-world example. Meet OpenClaw—the autonomous agent you’re going to understand by the end of this guide.
What OpenClaw does:
You open a simple chat window on your PC. You type:
"Organize my downloads folder."
What happens next (the invisible workflow):
Step 1 (0.5 seconds): OpenClaw sends your request to Claude API (the brain)
Step 2 (1 second): Claude analyzes the request and responds:
"This requires:
1. Scan /Downloads directory
2. Identify file types by extension
3. Create destination folders if needed
4. Move files to appropriate folders
5. Report results"
Step 3 (1 second): OpenClaw’s Python script:
- Lists all files in Downloads
- Groups them: PDFs, JPEGs, MP4s, installers, etc.
- Creates folders: Documents/PDFs, Images/Downloads, Videos/Downloads
- Prepares move operations
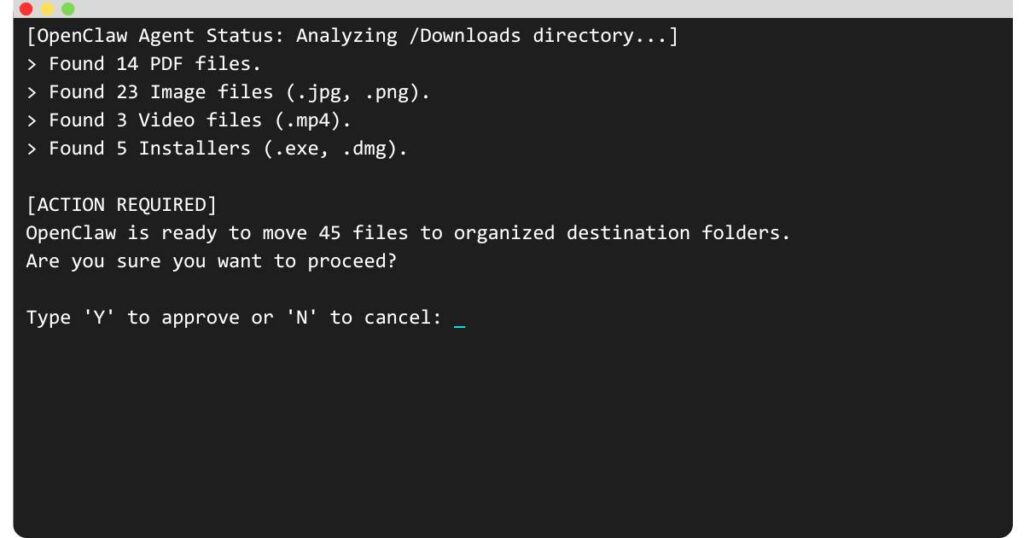
Step 4 (CRITICAL – Human approval): OpenClaw pauses and shows you:
Ready to move:
- 14 PDFs → Documents/PDFs
- 23 images → Images/Downloads
- 3 videos → Videos/Downloads
- 5 installers → Software/Downloads

Type 'Y' to approve or 'N' to cancel:
Step 5 (After you type Y): Files move. Done.
Step 6 (1 second): OpenClaw reports:
✓ Moved 45 files
✓ Created 4 new folders
✓ Downloads folder organized
Total time: 5 seconds + your approval time.
Manual time if you did this yourself: 10-15 minutes of dragging and dropping.
This is what local autonomous agents do. They bridge the gap between “AI tells you how” and “AI actually does it.”
According to ZeroSkillAI user testing, agents like OpenClaw reduce repetitive file management tasks by 87% compared to manual methods.
The “Zero Skill” Tech Stack: What You Actually Need
Here’s what scares people away when they ask how to build an AI agent: They think it requires years of programming experience. It doesn’t. You need four things. All free (or have generous free tiers). All beginner-friendly.
1. The Brain: An LLM API Key You need access to an AI model through an API (Application Programming Interface). Don’t let “API” scare you—it’s just a way to send text to AI and get text back through code instead of a website.
Options (pick one):
OpenAI API (ChatGPT):
- Cost: $5 gives you ~1 million tokens (roughly 750,000 words of AI processing)
- Best for: Logic and reasoning tasks
- Signup: platform.openai.com
Anthropic API (Claude):
- Cost: Similar to OpenAI, slightly different pricing structure
- Best for: Natural language and coding explanations
- Signup: console.anthropic.com
Google AI Studio (Gemini):
- Cost: Generous free tier, perfect for testing
- Best for: Beginners who want to experiment without costs
- Signup: ai.google.dev
For beginners, start with Google Gemini‘s free tier to learn how to build an AI agent at zero cost. Switch to paid options later if needed.
2. The Body: Python Installed on Your PC
Python is the programming language that controls your computer. It’s free, beginner-friendly, and pre-installed on Mac/Linux (Windows users need a 5-minute install).
Installation:
- Windows: Download from python.org (click “Add to PATH” during install—critical)
- Mac/Linux: Already installed, just open Terminal and type
python3 --versionto verify
You don’t need to “learn Python” to figure out how to build an AI agent. You’ll be using frameworks that write most of the code for you. You just need Python installed.
3. The Workspace: VS Code (Code Editor)
You need a place to write and run your agent’s code. Visual Studio Code (VS Code) is free, beginner-friendly, and has helpful features like auto-complete.
Installation:
- Download from code.visualstudio.com
- Install the Python extension (VS Code will prompt you)
- That’s it
Alternative: You can even use Notepad++ or any text editor, but VS Code makes debugging easier.
4. The Framework: CrewAI or AutoGen
This is what makes building agents “zero skill.” These frameworks provide pre-built templates that handle the complex orchestration between the LLM brain and your PC’s operating system.
CrewAI (Recommended for beginners):
- Simple syntax
- Great documentation
- Active community
- Install:
pip install crewai
AutoGen (Alternative):
- More powerful but steeper learning curve
- Better for multi-agent systems
- Install:
pip install pyautogen
For OpenClaw, we’d use CrewAI. It abstracts away 90% of the complexity.
That’s the entire stack:
- API key for brain
- Python for body
- VS Code for workspace
- CrewAI for framework
Total cost: $0 to start (using Gemini free tier)
Setup time: 30 minutes
No servers to rent. No cloud deployments. Everything runs on your PC. This is the foundation of a local AI assistant Python setup that gives you complete control over your automation.
Step-by-Step: The Agent Loop Explained
Before we dive into the steps, if you want to see the visual architecture and the original logic behind this project, check out our detailed Clawdbot workflow diagram.
Now let’s understand how OpenClaw actually works under the hood. Every agent follows the same four-step loop, repeated continuously. Mastering this autonomous AI agents tutorial concept is essential for building any agent system.
The Loop (How Agents Think and Act)
Step 1: PERCEPTION (What did the human ask?)
The agent receives your text command. This could be:
- Typed into a terminal
- Sent via a simple GUI window
- Received from a chat interface
Example: “Organize my downloads folder”
What happens: The agent captures this text string and prepares to process it.
Step 2: REASONING (What should I do about it?)
The agent sends your command to the LLM brain (via API) along with context about what it can do:
Prompt sent to LLM:
You are a file organization assistant. The user said: "Organize my downloads folder"

You can:
- list_files(directory)
- move_file(source, destination)
- create_folder(path)

Generate a step-by-step plan to fulfill this request.
LLM Response:
Plan:
1. Execute: list_files("/Downloads")
2. Analyze extensions to determine file types
3. For each type, execute: create_folder(destination)
4. For each file, execute: move_file(source, destination)
5. Report summary
What happens: The LLM translates your English request into concrete, executable steps.
Step 3: ACTION (Execute the plan)
The agent’s Python script runs the LLM’s plan:
# Simplified pseudocode - actual code more complex
files = os.listdir("/Downloads")
pdf_files = [f for f in files if f.endswith('.pdf')]

for pdf in pdf_files:
    move_file(f"/Downloads/{pdf}", f"/Documents/PDFs/{pdf}")
What happens: Python executes operating system commands that physically manipulate files on your computer.
Step 4: FEEDBACK (Report back to human)
The agent summarizes what happened:
✓ Task completed
- Moved 14 PDFs to Documents/PDFs
- Moved 23 images to Images/Downloads
- Moved 3 videos to Videos/Downloads
What happens: You get confirmation the task finished successfully.
Then the loop repeats. The agent waits for your next command.
This is the fundamental architecture of every autonomous agent. ChatGPT can’t do this loop because it lives in a browser—it can only complete Step 2 (reasoning).
A true local agent completes all four steps autonomously. That’s the difference between a chatbot and an agent. This is the core of learning how to build an AI agent that actually executes tasks rather than just discussing them.
The Golden Rule: Safety First (Human-in-the-Loop)
When learning how to build an AI agent, the uncomfortable truth about autonomous agents: They can break things.
An agent that can organize files can also accidentally delete them. An agent that can rename photos can also rename system files and brick your PC. This isn’t hypothetical—early agent experiments caused real damage when given unchecked access.
The solution: Human-in-the-Loop (HITL)
Never—and I mean never—let an agent execute destructive actions without your explicit approval.
How HITL Works
Bad agent (dangerous):
User: "Delete old files from downloads"
Agent: [Immediately deletes 50 files]
Agent: "Done! Deleted 50 files"
Problem: What if “old files” included an important document you hadn’t backed up yet? What if the agent misidentified file ages?
Good agent (safe):
User: "Delete old files from downloads"
Agent: [Analyzes files]
Agent: "Ready to delete 50 files older than 6 months:
- tax_draft_2024.pdf (8 months old)
- vacation_photo_001.jpg (7 months old)
- [48 more files listed]

Type 'Y' to confirm deletion or 'N' to cancel."
User: [Reviews list, sees tax draft]
User: "N"
Agent: "Deletion cancelled. No files modified."
What changed: The agent pauses before the irreversible action. You have veto power.
The HITL Implementation Pattern
Every agent should follow this pattern for any action that:
- Deletes files
- Moves files outside the working directory
- Modifies system settings
- Executes external programs
- Accesses the internet
The pattern:
- Agent generates action plan
- Agent shows you exactly what will happen
- Agent waits for explicit “Y” or “N”
- Only proceeds if you type “Y”
Example code structure:
# Simplified example
action_plan = agent.generate_plan(user_command)
print("Ready to execute:")
print(action_plan.summary())
approval = input("Type Y to approve: ")

if approval.lower() == 'y':
    agent.execute(action_plan)
else:
    print("Action cancelled")
This adds 5 seconds to each task. Worth it. Those 5 seconds prevent catastrophic mistakes.
The ZeroSkillAI automation methodology emphasizes HITL for all beginner agents. Advanced users can gradually whitelist safe operations for full automation, but start conservative.
Beyond File Management: What Else Can Agents Do?
OpenClaw is just the beginning. Once you understand how to build an AI agent and master the core loop, you can build systems that control PC with AI in increasingly sophisticated ways:
Email Automation
Command: “Archive all emails from last month that I didn’t reply to”
Agent: Scans inbox, identifies criteria-matching emails, shows you the list, archives on approval
Research Compilation
Command: “Create a summary document from all PDFs in my Research folder”
Agent: Reads each PDF, extracts key points, generates Markdown summary, saves to designated location
Screenshot Documentation
Command: “Take screenshots of all my open browser tabs”
Agent: Captures each tab, names files by page title, saves to Screenshots folder
Automated Backups
Command: “Back up my Documents folder to external drive”
Agent: Copies new/modified files, maintains folder structure, logs what was backed up
Social Media Scheduling
Command: “Post this image to Twitter at 3 PM”
Agent: Waits until scheduled time, opens browser, navigates to Twitter, uploads image, posts (with approval at each step)
The pattern is always the same:
- You give natural language command
- Agent translates to concrete steps
- Agent asks permission (HITL)
- Agent executes
- Agent reports results
Once you build OpenClaw, you’ve learned the fundamental pattern. Every other agent is just a variation on this theme.
The Learning Path: How to Build an AI Agent Step-by-Step
Where you are now: You understand conceptually what agents are and how they work.
Where you need to be: Actually building and running your first agent.
The gap: Writing the actual Python code and connecting the pieces.
Here’s your roadmap:
Week 1: Environment Setup
- Install Python and VS Code
- Get your API key (start with Gemini free tier)
- Install CrewAI:
pip install crewai - Verify everything works by running CrewAI’s “Hello World” example
Week 2: Build OpenClaw (Simplified Version)
- Start with a single command: “List all files in Downloads”
- Add: “Create a new folder called Organized”
- Add: “Move one specific file to that folder”
- Celebrate—you just built an agent!
Week 3: Add Intelligence
- Let the agent decide which files to move based on extension
- Add HITL approval before moving files
- Add error handling (what if folder already exists?)
Week 4: Expand Capabilities
- Add more file types
- Add more destination rules
- Add logging so you can review what the agent did
- Add a simple chat interface
By the end of Week 4, you have a functional autonomous agent running on your PC. You will fully understand how to build an AI agent running on your PC.
ZeroSkillAI will provide the exact copy-paste Python code for each week’s milestone in upcoming tutorials. You won’t be coding from scratch—you’ll be assembling pre-built components and customizing them.
Why Now? Why 2026 Is the Perfect Time
Five years ago, figuring out how to build an AI agent required deep machine learning expertise, custom model training, and expensive infrastructure. In February 2026, everything changed:
- LLM APIs are commoditized.
- Frameworks exist.
- Models understand code.
- Documentation is everywhere.
The barriers fell. Discovering how to build an AI agent, which required a PhD in 2021, now just requires a weekend and curiosity.
Common Beginner Mistakes (And How to Avoid Them)
Mistake 1: Trying to learn “all of Python” first Wrong approach: “I’ll spend 6 months learning Python, then figure out how to build an AI agent.” Right approach: “I’ll build an agent this weekend using templates.” You only need 5% of the language.
Mistake 2: Overcomplicating the first project Start simple. Master the loop with a trivial task like organizing one folder.
Mistake 3: Skipping HITL safety Always add approval gates. Agents will make mistakes.
Mistake 4: Using expensive API keys immediately Use Gemini‘s free tier until your agent works perfectly.
The Future You’re Building Toward
Today: You have learned the basics of how to build an AI agent with OpenClaw. It organizes your downloads folder when you ask. 6 months from now: You have 5 specialized agents (FileBot, ResearchBot, EmailBot, etc.). 1 year from now: Your agents talk to each other. 2 years from now: You have a personal AI infrastructure running 24/7 on a home server.
Conclusion: You Don’t Need Permission to Build This
Building autonomous AI agents isn’t reserved for engineers. The gatekeeping is over. The steps for how to build an AI agent are simple:
- Install Python and VS Code (30 minutes)
- Get a free API key (5 minutes)
- Follow a ZeroSkillAI tutorial with copy-paste code (2 hours)
- Run your first agent (5 seconds)
In the next tutorial, ZeroSkillAI will release the complete OpenClaw code. You’ll go from “I don’t know how to build an AI agent” to “I just built an AI agent” in one afternoon. Stop asking AI how to do things. Start building AI that does things for you. Your first agent is one weekend away.
Follow ZeroSkillAI.com for the complete OpenClaw tutorial, copy-paste code templates, and beginner-friendly agent-building guides. We’re making autonomous AI accessible to everyone—no coding experience required.
Want to see what’s possible with agents? Check our 100+ Best AI Side Hustles guide for ways to monetize your automation skills.
Need the foundational tools first? Our 10 Best Free AI Tools for Students covers the essential AI platforms you should master before building agents.
Pingback: Clawdbot Explained: Is It the Best AI Agent? Why Everyone's Buying Mac Minis (But You Don't Need To) -